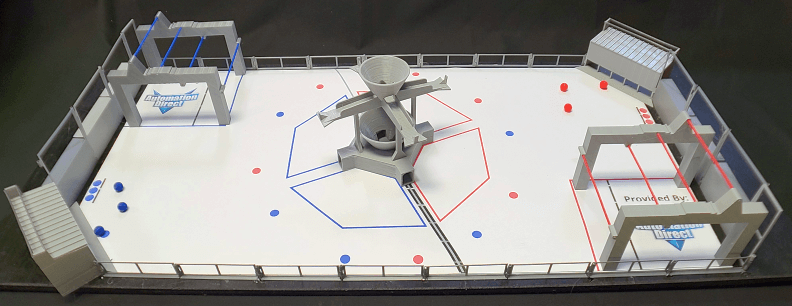
20:1 Scale Model of the 2022 FIRST Robotics 2022 Game Field provided by AutomationDirect.com
AutomationDirect’s animation team converted the animation models into 3D printable models. This is the “playing field” for the FIRST Robotics Competition game for 2022. For more info about FIRST and the 2022 game: “RAPID REACT” – please visit the FIRST website.
>>> CLICK HERE to download the STL files, Graphics and Floor Mat
These models are NOT intended to be accurate representations of the actual field – please do not use them for ANY game, rule or ‘build’ decisions. These models have been highly modified from the actual field drawings to make them easy to 3D print and assemble and to give the general appearance of the actual RAPID REACT field. To paraphrase from the Latin – Caveat Printor! – Let the printer beware!
All parts should fit together, but that depends heavily on your printer accuracy. Hopefully, they are close enough that you can file things down a little if needed. Holes usually need to be drilled out. The examples shown here were all printed on an inexpensive, low-end RepRap 3D Printer – so any printer you have should be able to print at least as well.
NOTE: We are NOT CAD experts, so if you see ways to improve these PLEASE do so and send us a copy – we will add it to the library. Let’s make this a community project!
Print settings we used for all items:
- 0.2mm layers
- Side wall thickness: .4mm
- Top and bottom .4mm
- Fill 10% – That’s really aggressive but saves print time. 25% will give you a better print.
- PLA: extruder 190 deg F, bed 60 deg F
- Supports – we didn’t use any. You’ll get better prints on some of these if you add supports (Terminal Base)
While we have your attention
Have you used your AutomationDirect $50 Kit-Of-Parts Voucher yet? You know – for the real-world robot! If not, have your lead mentor log on to the FIRSTinspires dashboard to get your team’s voucher code – THEN follow these simple (BUT IMPORTANT) instructions to activate and use your voucher. We’ve got thousands of parts that can be used to help build your ‘bot. Check that link for a list of products that are popular with FIRST teams.
>>>>>>>>>>>>>> NEW THIS YEAR: ALUMINUM EXTRUSION, cut to your length for FREE <<<<<<<<<<<<<
Assembly Instructions:
Note: Driver stations and field perimeter are identical to previous years – re-use those to save print time!
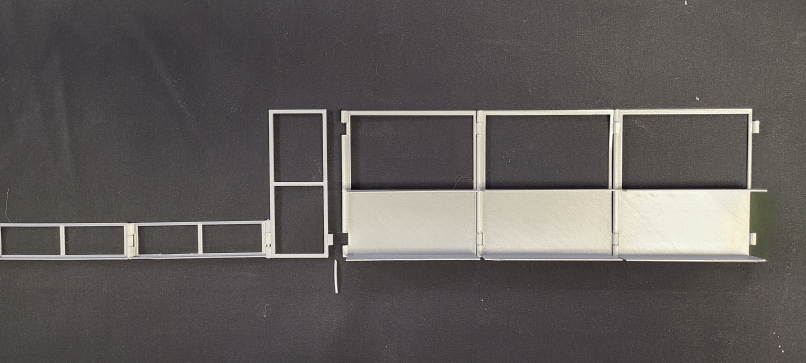
Field Perimeter Assembly
Print the following items:
Qty Item
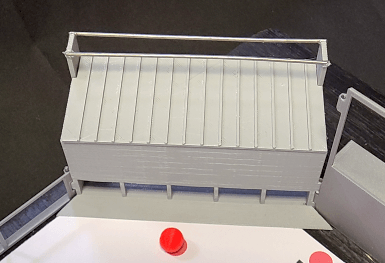
6 Driver Stations – print face down
2 Terminal Tops and Bottoms
2 Driver Station Offset Walls – face down
16 Side Rails – face down
Step 1: Assemble (8) Field Perimeter sections, (1 ) Driver Station Offset and (3) Driver Stations using 1.75mm PLA filament as pins:
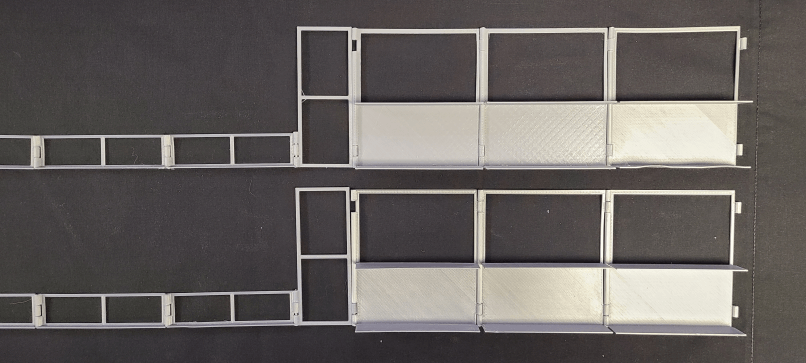
Step 2: Repeat for other side of field:
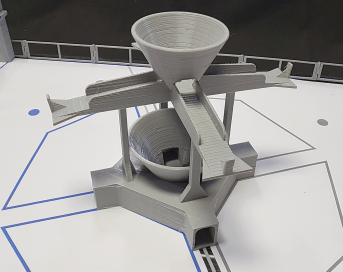
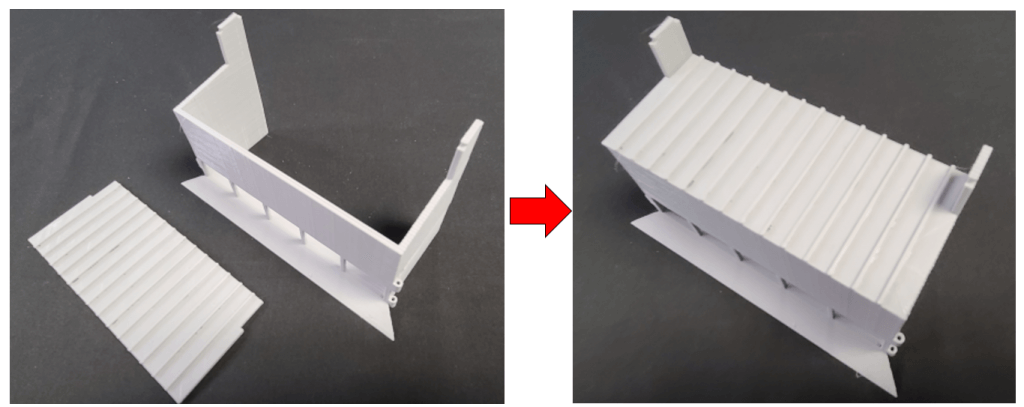
Step 3: Assemble Terminal Base: Glue Terminal Base Top to Terminal Base Bottom:
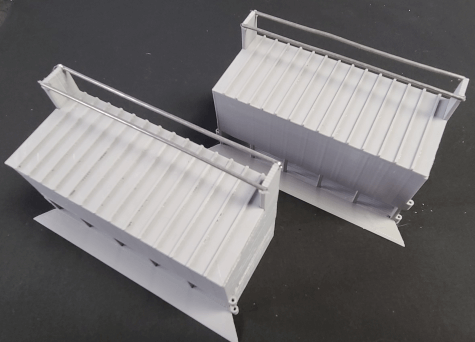
Step 4: Use coat hangers or something similar with roughly a 2mm diameter to create bars on top of Terminal. Length: 124mm. Glue them in place (we like to use a super glue gel like gorilla glue):
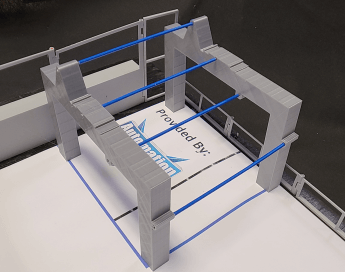
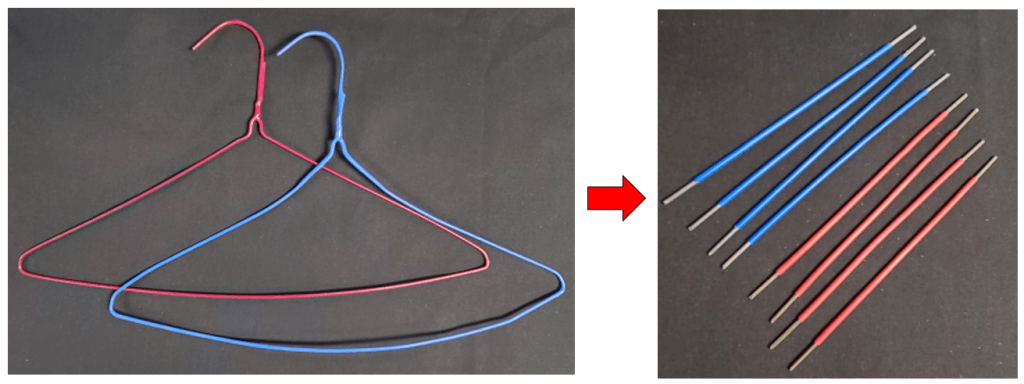
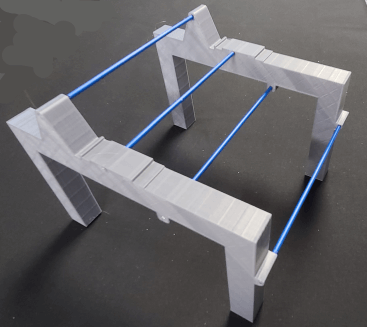
Step 5: Assemble Hangers using coat hanger wire (or something similar with a ~2mm diameter) cut to 140mm lengths. In this example we used some RED and BLUE plastic coated coat hangers, cut to length and stripped at both ends:
Step 6: Glue Top and Bottom Hub parts together:
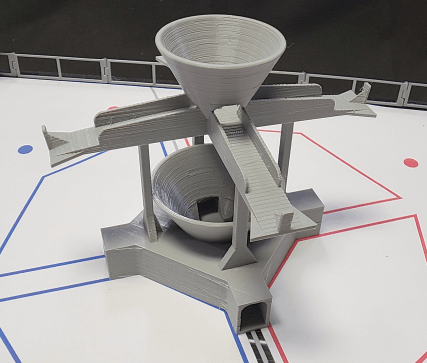
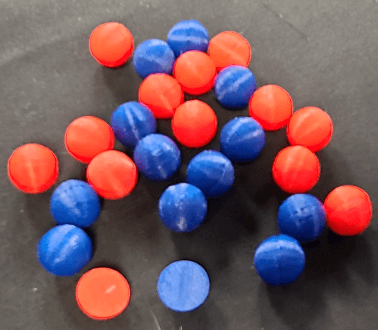
Step 6: CARGO: Print 22 CARGO halves of each color and glue together :
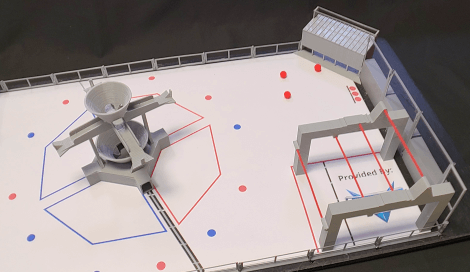
Step 7: Final Assembly: Add Terminals to field perimeter, place floor mat, populate with field elements. We recommend using a straight edge along the field perimeter to keep it aligned when gluing it down. NOTE: Field perimeter is a littel longer than it shoudl be making the field stretched out length wise. We’ll fix that one of these days …
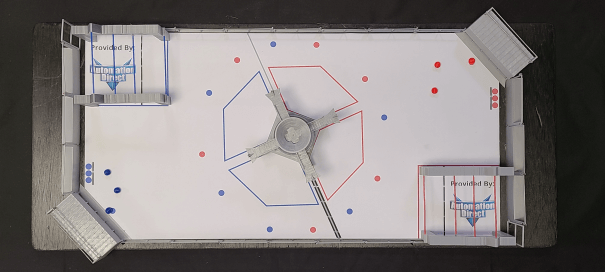
Some more images: