So you found a task that you’d like to automate but you need a way to sort out what pieces are needed and how they fit together. At this phase of development, organization is key. When specifying a project, staying organized can keep you on track and help you see the big picture. Flow charts, graphs, and spreadsheets are a few tools that can not only help you visualize the process but also track your progress. So, how about an example:
An Example Project
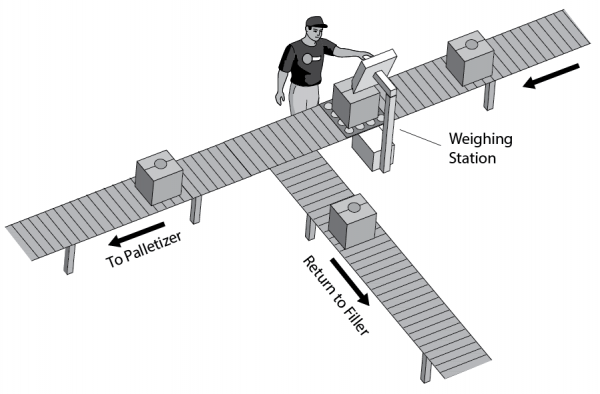
Below you see the bulk shipping conveyor line for a factory. What is this factory producing? Well, this is my example so it can be anything I choose. Since I like to eat, especially the sweet stuff, my factory is producing candy bars, and boy, are they delicious! Chad here has the important task of verifying that each of the boxes leaving the factory is filled with the appropriate amount of candy bars. Each box will hold 150 bars. We don’t expect Chad to count each candy bar, so he uses a scale to weigh each box. As the filled boxes come down the line, he stops the conveyor, weighs the box, and if correct, sends the box on to our palletizing system. The boxes are then put on pallets and shipped to our major customers. If the box is not the right weight, then Chad will send the box back to the filling station. This process works, but it is slowing down our delivery time. In order to stay competitive, we need to get these candy bars out as quickly as possible, so we decide to automate.
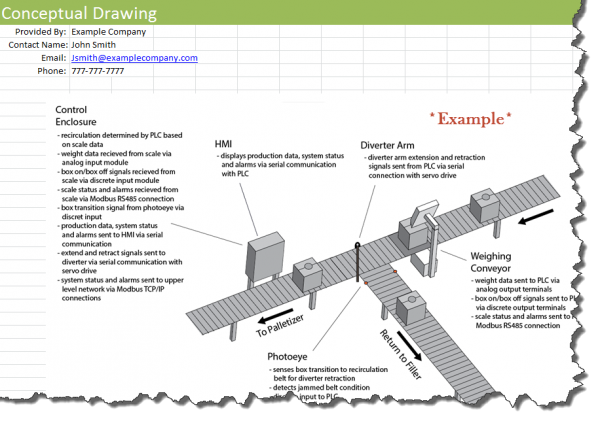
Below is an example of how the automation will work and the planning involved. First, the static scale will be replaced with a conveyor scale so we can alleviate the belt stoppages. The conveyor scale will communicate with a PLC (programmable logic controller) inside of our control enclosure. The scale will inform the PLC when a box is present, the weight of the box and when the box has cleared the scale. The PLC will then determine if the box needs to go back to be refilled or not. If it does need to be refilled, a diverter arm will extend and guide the box to the recirculating conveyor belt. At this point, we have a puzzle and we know the finished picture. We now need to specify the pieces. To do this, I am going to use a spreadsheet. You can download the example spreadsheet by clicking here; feel free to use this spreadsheet as an equipment specification template for your project.
Using the Equipment Specification Template

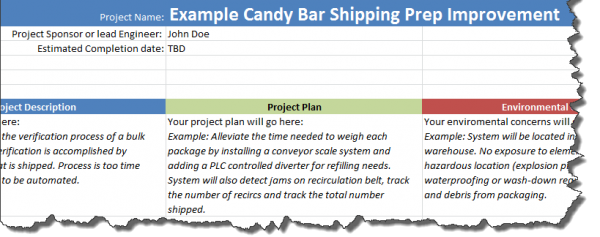
Download our Equipment specification template by Clicking Here In order to stay organized as we specify equipment for our example project outlined above, we have put together a spreadsheet with three different tabs. We have labeled our tabs: Project Plan, Conceptual Drawing, Parts List. Let’s take a look at each of these tabs if you would like to follow along you can download our example template by clicking here.
Project Plan:
On this tab, we included the high-level information that we needed to ensure that everyone was aware of what was included in this project. We gave the project a name, described it, and outlined the plan. Next, we pointed out some important requirements that our system will have to conform to. We point out Environmental Concerns, System Power Constraints, Scan Time/High-Speed Requirements, and the Network Protocol. (Note that depending on your project and environment you might need to highlights some additional requirements, but for our example, we will keep it simple.)
Conceptual Drawing:
Our next tab is dedicated to our conceptual drawings. Drawings are a very important part of our planning process because it takes what is in your mind and lays it out so others can see it. This helps to ensure that everyone is on the same page but it also helps us to identify any needs or problems that we might not have otherwise seen.
Parts List:
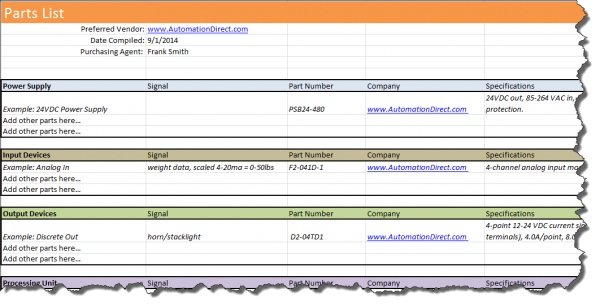
On the parts list tab, we have taken the time to list out all the parts we think are needed for this project. We also took the time to list the specifications, part number, and a link to each part. This tab serves multiple functions. First while filling it out, it will help trigger things in your mind you forgot you would need. Also, it will help ensure that come installation day you don’t have to halt all work to order another part. Additionally, by providing specifications and links for all part numbers you can refer to this list in the future if you need to find replacement parts or technical documentation.
Conclusion
Device specification is a major part of the automating process but it is only a part. Because of that, the devices chosen at this point are not concrete. In later phases of development, issues may arise that can cause the choices made here to change. Automating 101: An Industry Guide to Control System Engineering is a great resource for information on the automating process as a whole. One final thought on system specification; when specifying a system always plan for safety, use redundancy where needed, and consider future expansion possibilities.
Originally Published: September 2014


