AutomationDirect has partnered with BizWareDirect for several years, supplying DataWorx data collection and monitoring software for compatible DirectLOGIC programmable logic controllers (PLCs), Productivity3000 and WinPLC controllers. Previously, it had been necessary to purchase an OPC/DDE server and write code, or buy an HMI package, to collect data from AutomationDirect controllers. BizWareDirect’s data collection software makes it simple and cost-effective to collect valuable data; their engineering services assist manufacturers and utilities to automate, monitor, and collect data from their processes through the most productive and cost-effective means possible.
 DataWorx now has direct support for Do-more, easily connecting your Ethernet-enabled Do-more PLCs to standalone PCs or network servers for simple data logging. This means that any PC or server on the network can collect PLC data without the need for special PC programming or a 3rd party HMI, SCADA, or DAQ software application. DataWorx is easy to set up and use, and is affordably priced.
Some applications where DataWorx can be implemented include:
• Logging valuable production data to networked PCs or file servers for Statistical Process Control decision making.
• Archiving test data in a secure server file location with built-in date/time stamping features to satisfy quality assurance or audit trailing procedures.
• Data acquisition applications, as source content for historical trending for use by higher level business system applications.
• Transferring, updating and retrieving data into/from a network database.
Configuring a system to log data requires two logical steps. First, install the DataWorx software on a PC or file server on the same Ethernet network where the PLCs reside. Next, enable the controller logic to write data to your choice of delimited text files or CSV files to networked PCs or a file server.
The following are instructions on how to configure DataWorx for use with the Do-more PLC. Note: You will need DataWorx version 2.2 build 99 or higher and H2-DM1E for this exercise.
In Do-more Designer we will first create a UDP device that will be used in the PACKETOUT instruction.
Note: Ensure you have assigned an IP address to the Do-More CPU either in NetEdit or under System Information in Do-More Designer.
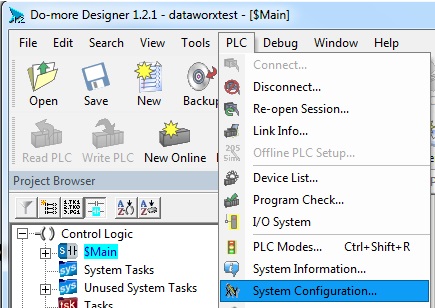
1. Click on PLC from the Menu bar > then click on System Configuration.
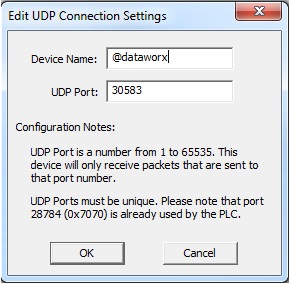
2. Now select Device Configuration > then select New Device.
3. In the Device name field enter ‘@dataworx’, and in the UDP port field enter’ 30583′ > then hit ok > then hit ok once again to close out the configuration window.
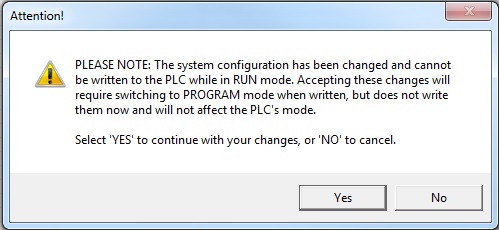
4. Select ‘Yes’ to the pop up window.
5. Next, on a empty rung enter a ‘PACKETOUT’ Instruction and fill in the fields with the below information:
- a. Device: Select the newly created ‘@dataworx device’.
- b. IP Address: Select Fixed and enter the IP address of the PC running DataWorx.
- c. To UDP Port Number: Enter ‘30583’ (port number DataWorx is listening to)
- d. Data Start: Select Numeric Data Block and enter: (These will match our DataWorx setup in a later step)
- i. Buffer Start = V0
- ii. Number of Bytes to Output = 8 (This will match our DataWorx setup in a later step)
- e. On Success: Leave as default or select an unused C bit.
- f. On Error: Leave as default or select an unused C bit.
6. Select the green checkmark to accept your selections.
7. Now for the input leg to the PACKETOUT instruction enter a Normally Open contact (F2) and assign an input or boolean bit.
8. Accept and Download this to the Do-More CPU.
 These next steps set up the DataWorx configuration:
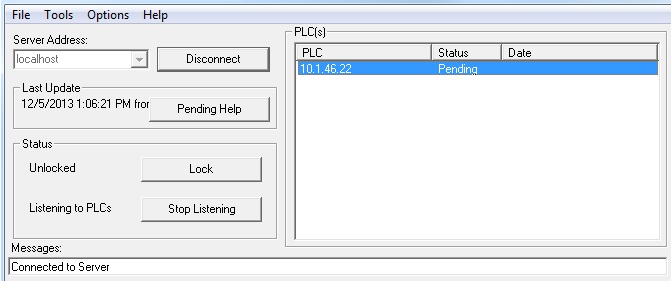
9. Open DataWorx PLC Monitor

10. Now click on Options > Configure Server > then Add.
11. Use DataWorx to setup the PLC Configuration:
- a. IP Address: enter IP address of your Do-More CPU
- b. Data Directory: Select a directory in which you would like the .csv file stored.
- c. PLC Configuration: Enter ‘V0’
- d. Do-More PLC: Check this box
12. Select Add and enter four (Integer) 2 byte words starting with V0.
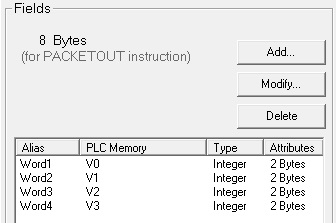
13. Select Ok to finish the configuration.
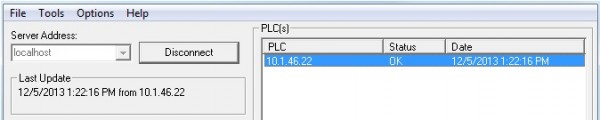
14. Now trigger the input rung to the PACKETOUT instruction in the Do-More PLC.
15. You should get the below update in the DataWorx window:
16. Now open the EXCEL .csv file in the Data Directory we set up in step 11.b and verify the data was written.
by David Bark

Originally Posted: March 19, 2014